Computer Modeling Class
Week 1
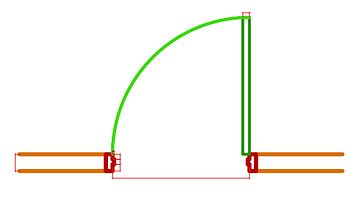
Our first lesson was an online lesson as Mr Kiat was still recovering from covid. This was the first lesson that was only with the 3D student so we did a round of introductions for both the teacher and students. This was an introduction class to AutoCAD. We learn the basics drawing skills like lines, curves, squares, circles, triangles, etc. Afterwards, we were tasked with doing the exercise to the right of a bed set and bookshelves. Overall the exercise was pretty simple since it was conducted online.
Exercise 1

Week 2

Exercise 2
Exercise 3
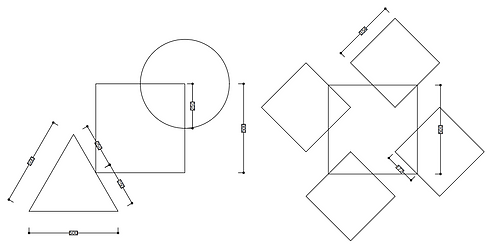
In the second lessons, we were introduced to round and champer tool, as well as layers. We were tasked with finishing these 3 exercise. I think I was frustrated with using the layers tools even though I had used other software with layers before. But I eventually got it. I think drawing the exercise was easier this week as hearing from the teacher directly was easier to understand than listening to him online.

Exercise 4
Week 3
During our third lesson, we first learn about the block & hatching tools. We also learn how to annotate and put dimensions into our drawings. It was not too hard to do this exercise

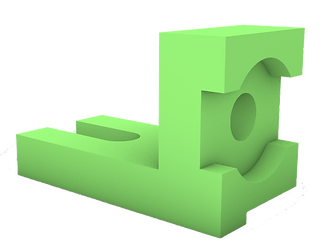
After that, we were also given some 3D structures to plot the top, front & right view. It didn't take me too long to convert the 3D models into the front, top and right view. This was because I had done this previously before. These are my attempt

Exercise 5A

Exercise 5B

Exercise 6A

Exercise 6B
Week 4 - 7
From week 4 - 6, we stared on a assignment to draw the orthographic view of 2 objects broken down into their individual parts. So the two objects I got was a Spray Bottle and a Tray Holder. Overall, the project was really fun yet frustrating at times with some of the more complex parts. But I got relatively simple object so it was alright. During Week 6, I got covid so I had spend the time doing out the layout of the technical drawings. I think that was the most tedious part and after that I stll had some errors in term of the annotating. Additionally, I should have put the assembly drawing of the object forst before the part drawing. Below are the technical drawings:
Spray Bottle

Tray Holder

Week 9
This lesson we were introduce the basics of another 3D software called Rhino. In order to get a hang of the basics, we had to create the 3D models of some of the exercises we did previously. Since I was well versed at Rhino, I decided to start doing from the harder exercise to the easier exercise since they are more fun to do.


After that, each of had to think of a brand and we had to draw their logo in a 500 x 500 scale. The brand I chose was Dyson. It was relatively easy to draw it and I just decided to add some thickness to it.

Week 10
For this lesson, we were taught the basic surfacing tools in Rhino that can help to build organic shapes. These functions were: Loft, Sweep 1Rail, Sweep 2 Rail, and Revolve. We told to practise using them on our own and to get the hang of it. This also allowed us to see the differences in the tools


After that, we were given the task to make this chair using the new functions we had learn. We used sweep 1 rail for the edge of the chair and loft for the seat area of it. I kind of don't like loft even though I use Rhino a lot. But I mange to make the shape with loft but the ends of it were not smooth. So I kind of cheated a bit and use curve network to make it smooth. Anyway, it wasn't too bad and mansge to make the chair shape and add some detailing to it.
We wre given some homework to do. Using the commands that we had learned, we were suppose to create a vessel. We had to present it to class next week but it got shifted to a week 13 as we had to help out with doing some exhibition set up on week 11.
Week 12 (Make up)
We had an online make up lesson on Week 12 to replace the missed lesson on week 11. It was a really short lesson in which he gave us a new assignment to do which was to create the Panton Chair in Rhino. The dimensions of the chair were given from its front and side view. Using these dimensions, we had to draw out the linework and create the form using the tools that we know. We were to present this and our vessel from the previous lesson in our week 13 class.
Week 13
The first half of the lesson was presenting our vessel design as well as our Panton chair design. This are my design:


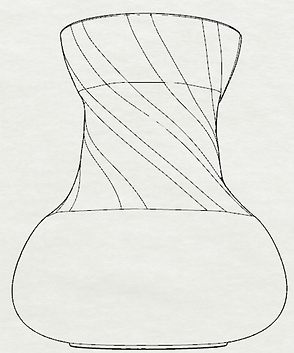
This is my vessel design. I was playing around with the sweep 2 rail commands for the shape. I wanted to have a twisted type of structure. Making the interanal structure was rather annoying as I couldn't really offset it properly due to the curve shape. For the bottom, I used the loft tool as well as the sweep 1 rail. I think I didn't realise I had to use all the function for this so I think there are some function that were used.
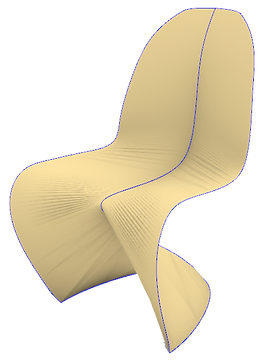


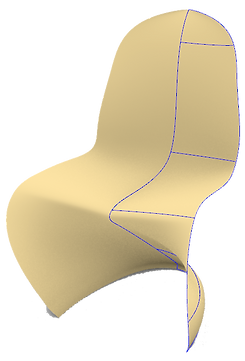
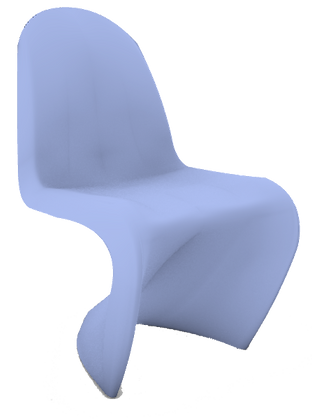
For the Panton chair, I did a many version of the chair to try and get the shape out. I tried using different method to get to the shape and adjust the curves that form the chair. I finally mange to make the one of the left using the curve network to make the shape.
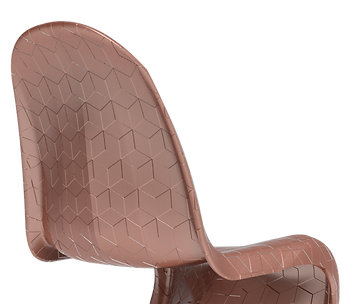
After the presentation, we were given some time to adjust and improve the form of the Panton chair. After which, we had to put the 3D file into Keyshot to render. We had to render 1 hero shot and 2 key detail shots. It was super fun playing around with textures and background in Keyshot.


Week 14
For this week, we taught how to make presentation board using Adobe Illustrator. Onthe board, we had to include our chair in its rendered hero shots and 2 key detail reders. In it we had to include description on the product that can be found online, development sketches, (also online) and the dimension. I re-rendered my chair to better do the layout of my presentation board below.


